UIKit Dynamics 是 iOS7 中新增加的 lib,可能对于没听过没见过的人来说,它有点难用。不过事实上,它并不难。通过这篇教程,你可以知道使用它来为你的 app 增加物理效果是多么的简单,并且你不需要直到深层的物理跟数学知识,也不需要深入了解像 Core Animation 这些框架。用过的人都说好,谁用谁知道。
####概述
在开始我们的教程之前,先来了解一些 UIKit Dynamics 相关的必要知识,还有一些经常使用的比较重要的类。要使用 UIKit Dynamics,我们没有必要引入其他的 framework,因为它是 UIKit 的一部分。只要你引入了 UIKit,Dynamics 也就可被使用了。它可以被用在任何 UIView 或者其子类的对象中。UIKit Dynamics 的核心是类 UIDynamicAnimator,它在 UIKit 中被实现,支撑这个类的是一个隐藏于世人前的物理引擎。它负责提供需要使用的物理效果。不过,就算 UIDynamicAnimator 是 UIKit Dynamics 的核心,但它自己一个人干不成什么事。我们需要将一些对象添加给它,这些对象称为**行为(behaviors)**,或者从代码层面说,称为 UIDynamicBehaviors。一个 UIKit Dynamics behavior 实际上在代码世界里扮演一个真实世界中的物理行为,同时它代表 UIKit Dynamics 提供给开发者的物理效果。跟 behavior 相关的类,概括如下:
- UIGravityBehavior:它的名字已经道破了一切。它代表使用了重力属性的 UIView 对象。
- UICollisionBehavior:它的存在,让两个或者多个 View 能够产生碰撞的效果,或者是在一个 View 的边界之中产生碰撞。
- UIPushBehavior:它可以将一个任意方向的力(或者说是加速度)施加在一个或者多个对象上,同时它支持两种不同的模式:一种是持续的作用力,让对象能够持续地增加速度;另一种是瞬间的作用力,让对象瞬时拥有一个最大速度。
- UIAttachmentBehavior:它被用于将两个对象连接在一起,或者将一个对象跟某个点连接在一起。
- UISnapBehavior:这个就牛逼了。插汉纸知道吗?X-man知道吗?万磁王知道吗?这个类就是万磁王。有了它,你可以在某个点吸引某个 View 对象。更屌的是,它包含一个 damping 属性,让该对象在最后被吸引到那个点时,在该点周围做弹性运动。
除了上面提到的这些之外,还有一个更加重要的类 —— UIDynamicItemBehavior。这个类并不会将特定的行为添加到某个对象中,但是它可以用来根据其他 behavior 来调整一些特定的属性。这些属性是:
- elasticity-弹性:它的值范围是从0.0到1.0,它用来指定两个对象碰撞的时候的弹性程度。
- density-密度:这个属性代表着对象的质量。这个值越大,对象的质量就越大。
- resistance-阻力:用于修改对象的速度的衰减(damping)。
- friction-摩擦力:可以设置两个对象之间的摩擦力。
- angularResistance-角速度阻力:用于修改对象的角速度的衰减(damping)。
- allowsRotation-允许旋转:这是一个布尔型属性,用来指定某个对象是否可以在物理运动中旋转。
UIkit Dynamic 真心容易使用,它简单到只需要寥寥几行代码。不管怎么说,我们对于 UIKit Dynamics 的简介到此结束。我们下一步要深入到我们真正关心的部分了。
现在,擦亮你的双眼,我们要进入一个崭新的世界了。
####构建一个Demo
#####重力效果
这里我用一个圆滚滚的 view 来模拟一个具有重力的球:
我们需要一个 Animator 以及一个球:
1 | @property (strong, nonatomic) UIDynamicAnimator *animator; |
将小球初始化之后添加到 self.view 上,然后调整它的位置,之后便是我们的核心代码了:
1 | self.animator = [[UIDynamicAnimator alloc] initWithReferenceView:self.view]; |
初始化 animator 时,我们将 self.view 传入,它作为 animator 起作用的地方。UIGravityBehavior 接受一个数组,来表明所有需要使用重力的 view 对象。
你可以看到,小球一直在坠落,就算我们已经看不到它,就算它已经跌落到了屏幕千里之外。想验证这点很容易:
1 | gravityBehavior.action = ^{ |
#####增加碰撞
好了,虽然我们已经成功让小球下落,但总不能让它漫无目的的运动下去吧。上帝说要有地板,于是我们需要给它造一块地板。我们需要使用 UICollisionBehavior 类来搞块地板。我们可以自行设置地板的边界,然后将它添加到 animator 上:
1 | - (void)showGravity |
在 collisionBehavior 初始化时,我们将 buleBall 作为需要应用碰撞的对象传入。addBoundaryWithIdentifier:fromPoint:toPoint: 方法则让我们声明一条看不见的边界。运行之后:
好了,现在我们能够将我们的 ball 挽留住了。但是 ball 的触底反弹好像不是太Q弹。我们可以通过修改 collisionBehavior 中的 elasticity 属性来达到我们的目的。
如果你还记得的话,我们在前面介绍过一个类,叫做 UIDynamicItemBehavior。我们可以通过它来替换所有 behavior 的属性。下面我们利用它来修改碰撞的反弹程度:
1 | UIDynamicItemBehavior *ballBehavior = [[UIDynamicItemBehavior alloc] initWithItems:@[self.buleBall]]; |
elasticity 属性取值范围为0.0到1.0,0.0代表完全没有弹性,1.0表示完全弹(反弹速度大小前后一样)。下面看看我们Q弹的 ball:
也可以尝试修改其他的属性,比如 resistance 或者 friction 来看看有什么影响。他们取值同样为0.0到1.0。
有时候我们可能需要在碰撞发生的时候执行一些其他操作,因此,UIKit 给我们提供了一套协议 UICollisionBehaviourDelegate。我们可以监听到两个对象,或者对象与边界之间的碰撞发生或者结束:
1 | @interface ViewController () <UICollisionBehaviorDelegate> |
1 | collisionBehavior.collisionDelegate = self; |
下面我们实现这样的功能:在 ball 发生碰撞的时候改变它的颜色:
1 | - (void)collisionBehavior:(UICollisionBehavior *)behavior beganContactForItem:(id<UIDynamicItem>)item withBoundaryIdentifier:(id<NSCopying>)identifier atPoint:(CGPoint)p |
#####更复杂的情况
到目前为止还好。我们了解了重力跟碰撞,还有碰撞的回调。但是仅仅看着一个 ball 做自由落体运动然后反弹最后静止,还是很 boring 的。下面我们添加一些更 nb 的东西。
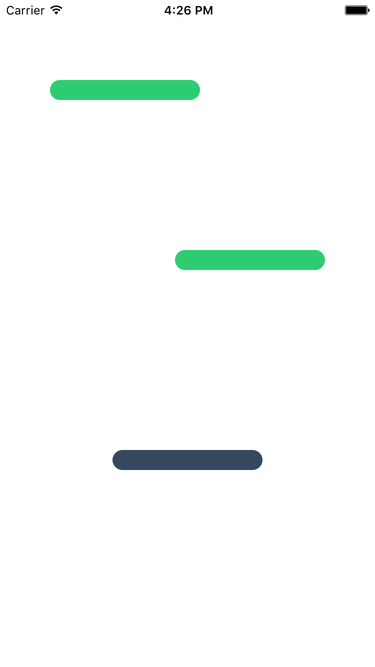
我们先来添加三个 view,作为 ball 的障碍。其中两个是固定的,一左一右,一上一下。第三个在最下面,并且当 ball 碰到它之后就开始旋转:
1 | - (void)playWithBall |
接着我们需要重新设置 ball 的初始位置,让它可以落在最上方障碍物上面:
1 | self.buleBall.center = CGPointMake(75, 25); |
在碰撞行为初始化的地方,不要忘了将新增加的障碍物一并添加碰撞:
1 | UICollisionBehavior *collisionBehavior = [[UICollisionBehavior alloc] initWithItems:@[self.buleBall, obstacle1, obstacle2, obstacle3]]; |
大概你会发现我们增加了两行新的代码,第一行是:
1 | collisionBehavior.translatesReferenceBoundsIntoBoundary = YES; |
表示是否允许 self.view(animator 起作用的 view)的边界作为可被碰撞的边界。这按很重要,如果你不想你的 ball 或者你的其他 view 消失在视野之外的话。第二行新代码:
1 | collisionBehavior.collisionMode = UICollisionBehaviorModeEverything; |
表示所有被添加到 collisionBehavior 中的对象都能发生碰撞。
下面设置 ball 的其他属性:
1 | UIDynamicItemBehavior *ballBehavior = [[UIDynamicItemBehavior alloc] initWithItems:@[self.buleBall]]; |
下面我们来修改一下前两个障碍物的 property。我们前面提到过,我们需要它们维持在原地不动,所以,我们得将它们俩的 desity 设置得大一些,让它们“重到不行”,好让 ball 的碰撞难以对他们造成影响:
1 | UIDynamicItemBehavior *obstacles1AndObstacles2 = [[UIDynamicItemBehavior alloc] initWithItems:@[obstacle1, obstacle2]]; |
对于第三个障碍物,我们让它转起来,所以,我们不必增大他的 desity:
1 | UIDynamicItemBehavior *obstacle3Behavior = [[UIDynamicItemBehavior alloc] initWithItems:@[obstacle3]]; |
最后一步,我们需要在点击屏幕的时候,给 ball 一个推力。我们声明一个私有的属性来表示 ball 目前是否正在滚动:
1 | @interface ViewController () <UICollisionBehaviorDelegate> |
现在我们来实现方法 touchesBegan:withEvent: method::
1 | - (void)touchesBegan:(NSSet<UITouch *> *)touches withEvent:(UIEvent *)event |
如果 ball 没有在滚,我们就让它滚!mode 参数我们传入 UIPushBehaviorModeInstantaneous,表明我们会让 ball 在最开始得到它的最大速度,而不是持续性增加;magnitude 表示力的大小,但实际上定义了 ball 的速度。同时还有一个 angle 属性,用于表示力的方向。
#####想玩个球?
我们前面所做的,可以进化成一种碰撞游戏。我们可以在屏幕底部添加一个球拍,让它可以跟随我们的手指移动。我们需要添加的代码不多,let‘s go。
首先,创建一个新的 View 对象,代表我们的球拍。同时声明一个CGPoint 属性来保存球拍的初始中点位置。你会知道这有多么方便的:
1 | @interface ViewController () <UICollisionBehaviorDelegate> |
现在,回到 playWithBall 方法去设置我们的球拍,新代码应该添加在下面代码的后面:
1 | [self.view addSubview:obstacle1]; |
设置球拍:
1 | self.paddle = [[UIView alloc] initWithFrame:CGRectMake((SCREEN_SIZE.width - 10) / 2.0f, SCREEN_SIZE.height - 20.0f, 100, 30)]; |
这里需要注意的是,我们将球拍的初始中心点保存了起来。剩下的代码将变得简单:
下面,在 collision behavior 的初始化方法中做一些小修改:
1 | UICollisionBehavior *collisionBehavior = [[UICollisionBehavior alloc] initWithItems:@[self.buleBall, self.paddle, obstacle1, obstacle2, obstacle3]]; |
最后,我们设置一些球拍的属性。跟前两个障碍物一样,我们不希望我们的球拍旋转或者被碰离原位。在 playWithBall 方法的最后,增加下面代码:
1 | UIDynamicItemBehavior *paddleBehavior = [[UIDynamicItemBehavior alloc] initWithItems:@[self.paddle]]; |
球拍有了,但是它现在还不能移动。我们之前说过,我们需要球拍随着手指而移动,所以,我们接下来实现 touchesMoved:withEvent: 方法。另外,我们只允许球拍水平移动:
1 | - (void)touchesMoved:(NSSet<UITouch *> *)touches withEvent:(UIEvent *)event |
这里你应该可以发觉前面使用 paddleCenterPoint 属性的意图了。如我所说,我们希望在 y 轴方向上的坐标保持不变。最后,重中之重,如果我们不调用 updateItemUsingCurrentState 的话,我们将看不到任何改变发生。
好了,目前我们有了一个能随我们手指运动的球拍。但是如果你现在马上运行 Demo,返现球拍不能让球运动起来。当球拍碰撞到球的时候给球添加一个额外的作用力会怎么样呢?前面我们实现了两个碰撞的 delegate,现在我们实现多一个 delegate。下面的这个 delegate 会在两个 item 碰撞的时候才会被调用(ball 跟球拍之间的碰撞)。每当新的碰撞在两个 View 之间产生的时候,一个新的推力将会添加到 ball 上。
1 | - (void)collisionBehavior:(UICollisionBehavior *)behavior beganContactForItem:(id<UIDynamicItem>)item1 withItem:(id<UIDynamicItem>)item2 atPoint:(CGPoint)p |
现在运行 Demo,就可以看到我们的球拍是多么的溜到不行:
####总结
有了这个用于 UIView 的“物理引擎”,我们可以搞出很多很屌的效果。需要记住,我们可以将很多效果组合起来。但是可能难免会有冲突。还有一些其他的效果没有在这片文章里描述,但是其实也大同小异,试试便知。
以上
参考链接:Adding Animated Effects to iOS App Using UIKit Dynamics