Core Bluetooth 让我们得以与配备 BLE 技术的设备进行通讯。通过这篇教程你可以直到如何配置 Core Bluetooth 的 central 跟 peripheral,还有如何进行通讯,跟一些 CB 中固有的最佳编程实践。
这篇文章为 BLE 系列教程中的第二篇,第一篇文章阐述了一些理论性的内容,而这片文章则是实践性的内容,文中用到的源代码可以戳这个链接下载。(发现原文中的样例工程有点问题,可以用苹果的官方 DEMO来做参照,功能是一样的,代码大同小异。)Demo实现的功能很简单,就是在 central 跟 peripheral 之间发送文字消息。下面开撸。
#####下载样例工程源代码
这篇教程的目的是教你如何使用 Core Bluetooth framework。我们准备了一个样例工程代码,让你理解的容易点,让你省去创建工程配置视图之类的杂物事。
这篇教程是建立在你已经有一些使用 Xcode 开发 iOS 的基础知识之上的,下面我们只关注 Core Bluetooth 数据。样例代码包含下面这些内容:
- 一个使用导航栏的 APP,包含三个试图,一个 controller
- 一个拥有两个 button 的初始
ViewController CBCentralManagerViewController,创建了一个自定义的 iBeaconCBPeripheralViewController,接收 iBeacon 跟里面的信息- 一个
SERVICES头文件,里面有一些 APP 要使用的变量
现在可以找两部支持 BLE 的机子,将工程编译进去,玩儿一下。
SERVERS.h 文件包含两个独立的 UUID,它们是在 terminal 中用 uuidgen 命令生成的。你可以自己生成一份或者直接使用它们。
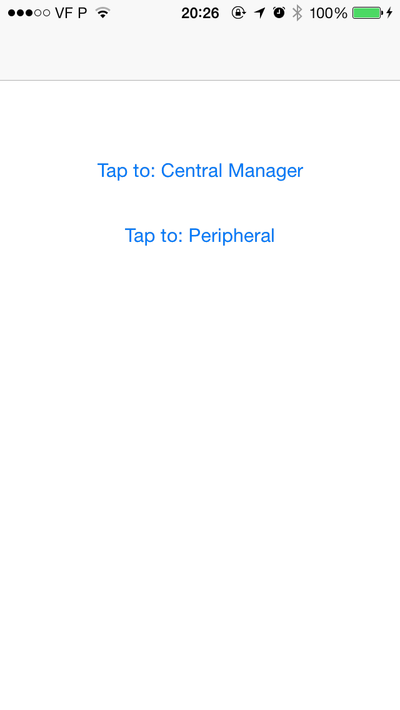
注意,本篇教程需要两部 iOS 设备来工作。运行工程之后你会看到如下界面:
#####Central 编码
这部分内容集中在 CBCentralManagerViewController 这个类。第一部,添加两个协议来支持 CBCentralManager 跟 CBPeripheral。这两个协议定义了一些方法(后详)。你的应该如下:
1 | @interface CBCentralManagerViewController : UIViewController < CBCentralManagerDelegate, CBPeripheralDelegate> |
现在,你需要定义三个属性:CBCentralManager, CBPeripheral 跟 NSMutableData。前面两个对象很明显了,最后一个是用来存储两个设备之间共享的信息,也就是一段文字。
1 | @property (strong, nonatomic) CBCentralManager *centralManager; |
到这里,你可以转到 .m 文件。你会看见一些警告,因为有一些协议中的必须方法还没有实现,现在先不用着急。我们先来初始化 centralManager 跟 data 这两个对象。初始化 centralManager 应该用自身作为 delegate,queue 参数直接传空。在 viewDidLoad 函数中添加如下代码:
1 | - (void)viewDidLoad |
然后实现 - (void)centralManagerDidUpdateState:(CBCentralManager *)central 这个方法。它是一个协议中的必须方法,它可以接收到设备的蓝牙状态。设备可能有几种可能的状态取值:
- CBCentralManagerStateUnknown
- CBCentralManagerStateResetting
- CBCentralManagerStateUnsupported
- CBCentralManagerStateUnauthorized
- CBCentralManagerStatePoweredOff
- CBCentralManagerStatePoweredOn
如果你在没有蓝牙4.0的机器中运行,会接收到 CBCentralManagerStateUnsupported 这个状态。而当你接收到 CBCentralManagerStatePoweredOn 这个状态你便可以开始扫描设备了。扫描设备使用 scanForPeripheralsWithServices: 这个方法。如果参数传空,那么 CBCentralManager 会开始扫描所有服务。而这里你应该使用保存在 SERVICES.h 中的 UUID。代码如下:
1 | - (void)centralManagerDidUpdateState:(CBCentralManager *)central { |
此时,APP 会开始查找其他设备。但是目前还不能收到其他设备广播出来的信息。接下来应该添加另一个协议方法。这个方法在发现设备时(接收到设备发出的广播包时)就会被调用。但是,这个工程中你只会接收到那些广播 TRANSFER_SERVICE_UUID 的外设广播包。
另外,我们需要将发现的设备保存起来,以便将来可以快速访问。代码如下:
1 | - (void)centralManager:(CBCentralManager *)central didDiscoverPeripheral:(CBPeripheral *)peripheral advertisementData:(NSDictionary *)advertisementData RSSI:(NSNumber *)RSSI { |
与外设之间的连接也有可能会失败。如果失败了,我们需要实现另外一个回调来捕获这个错误并且处理它:
1 | - (void)centralManager:(CBCentralManager *)central didFailToConnectPeripheral:(CBPeripheral *)peripheral error:(NSError *)error { |
上面代码使用了一个cleanup函数。它的实现看起来可能有些复杂难懂,但是不要紧,现在先有个概念,等看完这篇教程再回过头来看这个函数,自然了然于胸。
这个方法取消所有对外设的订阅,或者直接断开链接(如果没有订阅的话)。它遍历所有 service,然后是 characteristic,移除对它们的绑定。代码如下:
1 | - (void)cleanup { |
在我们成功连接到某个设备之后,我们现在需要发现它的 service 跟 characteristic。在连接建立之后,停止扫描,然后清除我们接收过的所有数据。接着成为外设的 delegate,最后查找匹配我们的 UUID 的 service(TRANSFER_SERVICE_UUID)。代码如下:
1 | - (void)centralManager:(CBCentralManager *)central didConnectPeripheral:(CBPeripheral *)peripheral { |
到了这里,这个外设就会开始回调 delegate 了。其中一个回调如下,它用来发现某个服务中的 characteristic。这里需要发现的 characteristic 为 TRANSFER_CHARACTERISTIC_UUID。代码如下:
1 | - (void)peripheral:(CBPeripheral *)peripheral didDiscoverServices:(NSError *)error { |
到这里,如果一些顺利正常的话,那么我们的 characteristic 就会被发现。然后会下面的回调就会被调用。发现所需的 characteristic,我们需要订阅它,这样便可以让 CBCentralManager 接收到它的数据。
我们需要遍历 characteristic 数组来检查是否有我们需要的 characteristic,如果有的话,订阅它。一旦这一步完成之后,你便只需要翘起二郎腿来等待数据自己送上门儿了。代码如下:
1 | - (void)peripheral:(CBPeripheral *)peripheral didDiscoverCharacteristicsForService:(CBService *)service error:(NSError *)error { |
好了,我们已经订阅了 characteristic,当 外设有新数据传送的时候,下面这个回调就会被调用。
我们首先创建一个 NSString 来保存 characteristic 的值。然后,我们需要检查数据是否已经传输完成了,是否有更多的数据会被传输。在所有数据都传输完毕之后,你可以将 characteristic 之间的连接断开,并且也断开与外设之间的连接。虽然你也可以继续保持连接。
注意,在所有数据传输完成之后,你可以断开链接或者等待新的数据。这个回调让我们知道是否会有更多数据到达。代码如下:
1 | - (void)peripheral:(CBPeripheral *)peripheral didUpdateValueForCharacteristic:(CBCharacteristic *)characteristic error:(NSError *)error { |
另外,有一个方法可以让我们的 CBCentral 知道某个 characteristic 的订阅状态更改。通过这个方法我们可以直到某个 characteristic 的状态什么时候会改变。在这个方法中,我们需要检查对某个 characteristic 的订阅是否停止了,如果是的话,我们就断开与它的连接:
1 | - (void)peripheral:(CBPeripheral *)peripheral didUpdateNotificationStateForCharacteristic:(CBCharacteristic *)characteristic error:(NSError *)error { |
当两个设备之间的连接断开时,你需要清除本地对该设备的拷贝。可以使用下面的回调方法。这个方法简单地将 peripheral 这位 nil。另外,你可以重启对设备的扫描或者终止程序,这里的操作是重启扫描操作。代码如下:
1 | - (void)centralManager:(CBCentralManager *)central didDisconnectPeripheral:(CBPeripheral *)peripheral error:(NSError *)error { |
最后,需要一个额外的步骤。每次当试图消失(view disappear)时,都需要将扫描操作停止掉。在 viewWillDisappear: 方法中添加:
1 | [_centralManager stopScan]; |
现在我们对 central 的编码操作到这里就告一段落了。接下来我们开始配置外设,peripheral。
#####Peripheral 编码
在这部分教程,我们会集中在 CBPeripheralViewController 这个类。第一部,给我们的类添加两个协议:CBPeripheralManagerDelegate, UITextViewDelegate。代码如下:
1 | @interface CBPeripheralViewController : UIViewController < CBPeripheralManagerDelegate, UITextViewDelegate> |
接着定义4个属性。前两个分别代表 peripheral 管理器跟它的 characteristic,第三个是用于发送的数据,最后一个代表数据的索引,index:
1 | @property (strong, nonatomic) CBPeripheralManager *peripheralManager; |
现在转到 .m 文件。我们要做的第一部是初始化 _peripheralManager,然后配置它,让它开始广播。service 的广播应该使用我们前面定义过的 service UUID。这一切在 ViewDidLoad 函数中完成:
1 | - (void)viewDidLoad { |
CBPeripheralManagerDelegate 协议中有一个必须的回调需要实现。跟 CBCentralManager 类似,你应该根据回调中的 state 判断来执行一些不同的操作。当判断到 state 为 CBPeripheralManagerStatePoweredOn 时,你就可以构造自己的 service 跟 characteristic 了。
每个 service 跟 characteristic 都应该用一个 UUID 来标识。注意,characteristic 的初始化函数中的第三个参数传空,这样表示待会用于传输的数据会在稍后被定义。通常如果我们需要动态创建数据,就会这样来构造它。但是如果想要传输静态的数据,那么你可以直接在这个参数中传入内容。
properties 参数定义了该 characteristic 可被如何使用,有几个可取的值:
- CBCharacteristicPropertyBroadcast
- CBCharacteristicPropertyRead
- CBCharacteristicPropertyWriteWithoutResponse
- CBCharacteristicPropertyWrite
- CBCharacteristicPropertyWrite
- CBCharacteristicPropertyNotify
- CBCharacteristicPropertyIndicate
- CBCharacteristicPropertyAuthenticatedSignedWrites
- CBCharacteristicPropertyExtendedProperties
- CBCharacteristicPropertyNotifyEncryptionRequired
- CBCharacteristicPropertyIndicateEncryptionRequired
可以在官方文档中获取更多信息 CBCharacteristic Class Reference
初始化中的最后一个参数是关于 attribute 的读、写、编码权限。同样,它有几个可取的值:
- CBAttributePermissionsReadable
- CBAttributePermissionsWriteable
- CBAttributePermissionsReadEncryptionRequired
- CBAttributePermissionsWriteEncryptionRequired
初始化了 characteristic 之后,就应该来定义我们的 service 了,这里要使用类 CBMutableService。注意 service 需要使用我们的 UUID TRANSFER_CHARACTERISTIC_UUID 来定义。将 characteristic 添加到 service,然后把 service 添加到 peripheral manager 中。代码如下:
1 | - (void)peripheralManagerDidUpdateState:(CBPeripheralManager *)peripheral { |
现在我们有了 service 跟 它的 characteristic(此例只有一个)了,接下来我们需要侦测其他设备在何时连接到此 peripheral,然后执行相应的操作。下面这个回调在某个设备订阅我们的 characteristic 时被调用,然后开始发送数据。
程序会发送在 textview 中的文字。如果用户改变了它,程序会实时将它发送到 central 中。发送过程的代码编写在一个自定义的方法 sendData 中:
1 | - (void)peripheralManager:(CBPeripheralManager *)peripheral central:(CBCentral *)central didSubscribeToCharacteristic:(CBCharacteristic *)characteristic { |
sendData 函数处理所有的数据传输逻辑。它会执行下面几个操作:
- 发送数据
- 发送数据结束标识
- 检测 APP 是否已经发送数据完成
- 检查是否所有数据都已经被发送了
完整代码如下,代码中的注释可帮助你理解程序的操作:
1 | - (void)sendData { |
最后,你需要实现一个回调,它在 updateValue:forCharacteristic:onSubscribedCentrals: 方法失败之后,peripheralManager 准备好发送下一块数据的时候被调用。这样确保了数据包到达的顺序跟它们发送的顺序一致。代码如下:
1 | - (void)peripheralManagerIsReadyToUpdateSubscribers:(CBPeripheralManager *)peripheral { |
至此,所有编码工作完成。可以打开 Demo 测试一下效果了。
#####小结
由于使用的回调数量比较多,调完一个还有一个,所以可能会有点乱。不过只要抓住一条主线,就是 service 与 characteristic 之间的关系。另外,明白一下几点对程序理解也有帮助:
- 我们需要取的值是在 characteristic 中的
- 每次发送数据都有最大容量限制,为20个字节
- 发送数据有可能失败,如果失败了,则立即终结发送,等待下次回调